WordPress Theme Settings Manual
LIQUID PRESS MAUNAL-
How to Configure WordPress Themes
New AI-Ready WordPress Theme LIQUID PRESS 2.0 Now Available
This section explains how to configure the theme. Because the available settings vary by theme, please also see the theme-specific configuration guides.Configuration methods by WordPress theme
LIQUID PRESS BLOCK: how-to manual for the block theme
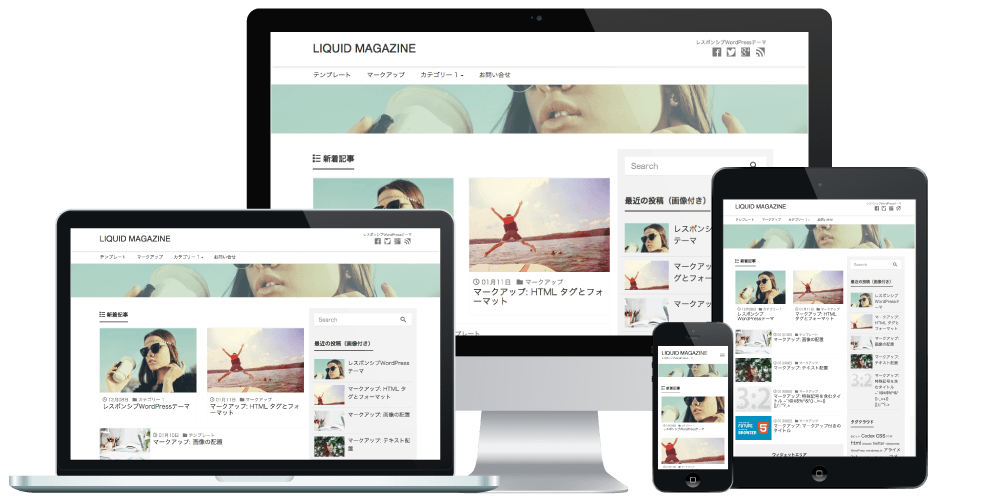
LIQUID MAGAZINE: How to create an owned media site
LIQUID CORPORATE: How to create a corporate site
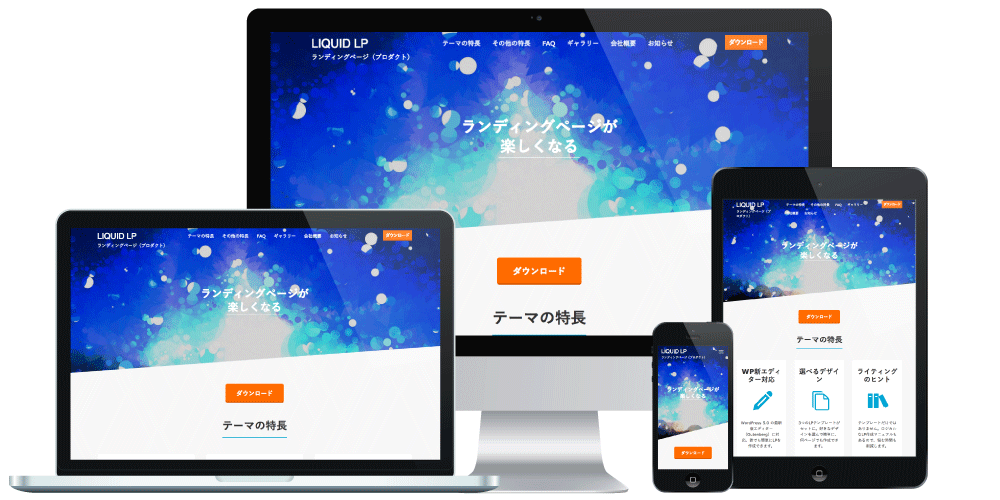
LIQUID LP: How to create a landing pagePDF manuals
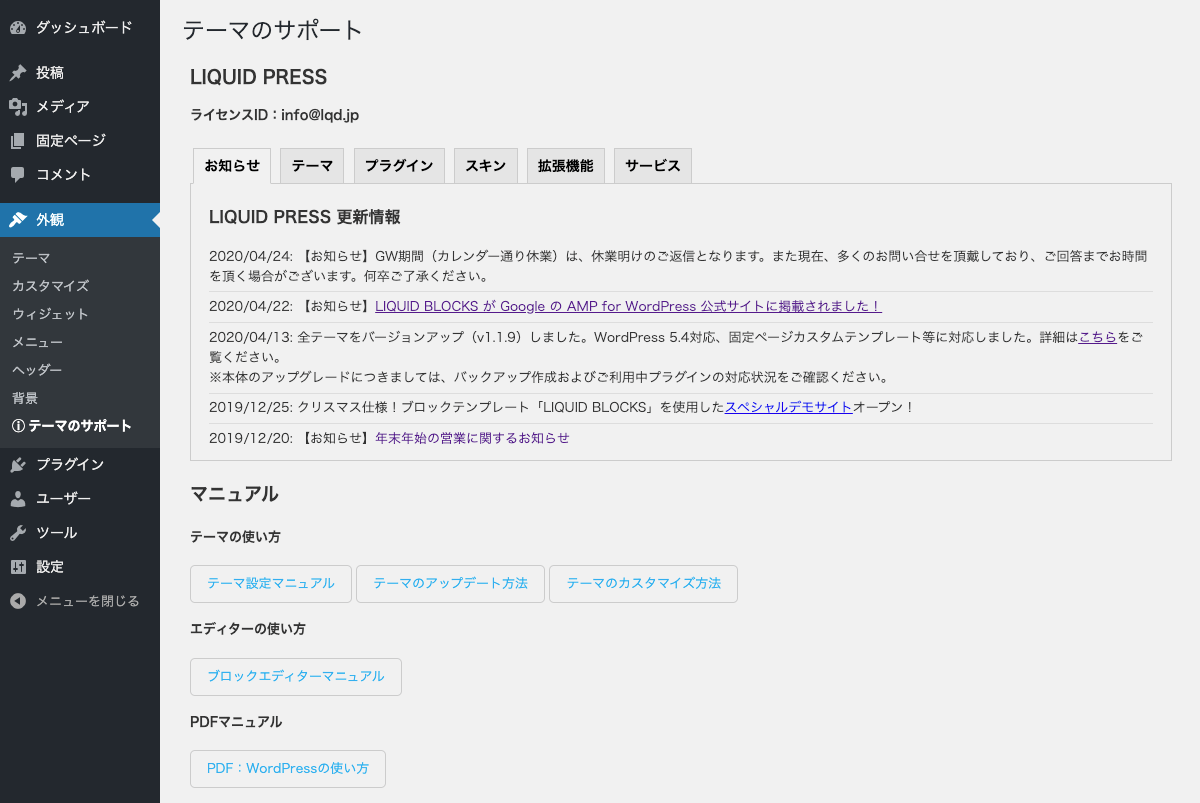
Available at WordPress admin screen > Appearance > Theme Support (license ID required).
WordPress usage manual
List of settings used on the demo site
Theme update information and more can also be checked from the Theme Support screen. *Excluding trial versionsVideo manuals
The themes below also have video manuals, so please take a look.
LIQUID MAGAZINE: video manual
LIQUID CORPORATE: video manualOther manuals
Customization manual
How to create a child theme
How to use the block editor
Block style design
Design skins and parts -
Customize (theme settings)
*For top page settings, please set admin screen > Settings > Reading > Your homepage displays to "Your latest posts" and check again.
*If your layout settings cannot be saved, please temporarily disable the server's WAF setting and check again.
If you have newly installed WordPress core, the LIQUID PRESS sample content is applied at Appearance > Customize.
-
This is done at WordPress admin screen > Appearance > Customize.
You can configure settings while previewing them.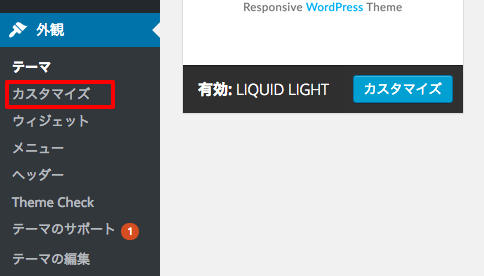
Preview
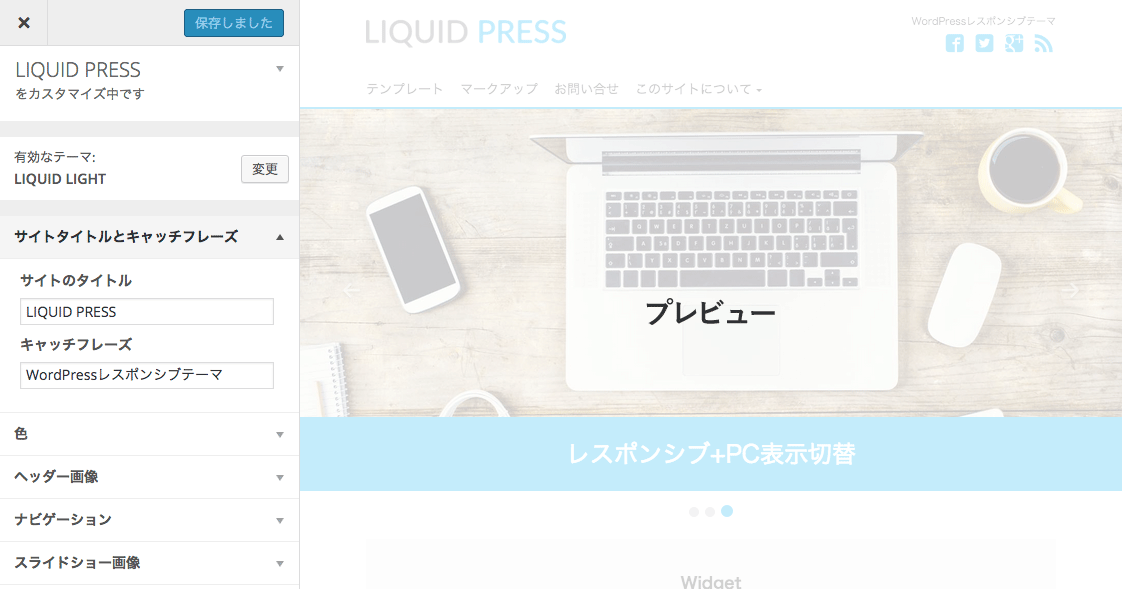
On the Customize screen (the Customizer), the settings appear on the left and the preview on the right. You can also click the device icons at the bottom left to check the responsive display. In addition, you can click article links in the preview to move to those article pages.
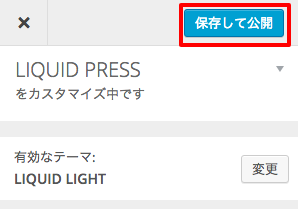
 When you have finished configuring, click "Save & Publish." *Some settings may not take effect until they are published.
-
Site Identity
Site title
This is set in the title tag and elsewhere. The title is optimized per page.Tagline
This is displayed in an h1 tag, so it is effective to include keywords you want to target for SEO.
Example: site name "ABC Inc."
Example: tagline "A system development company in Tokyo"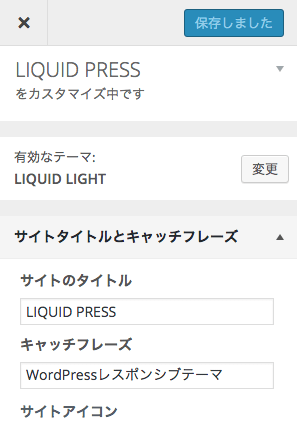
Site icon
This sets the favicon (displayed in the browser tab and elsewhere), the Apple touch icon, and so on.
Upload a square PNG image. You can also crop it on the spot.
*This is a feature of WordPress 4.3 and later. On earlier versions, please configure it via the custom header.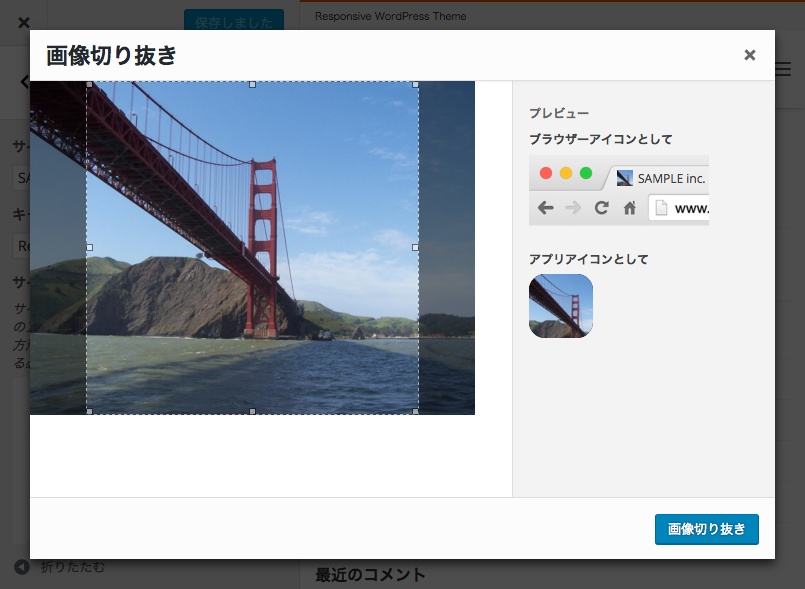
-
Colors
Set the text color, theme color, background color, and so on. The theme color is also reflected in the block editor's color palette.
Click "Select Color," choose a color from the color picker or enter a color code, then click "Select Color" again to confirm.
Clicking "Default" restores the default color. Deleting the color code clears the setting completely.
You can check where each color is applied in the preview.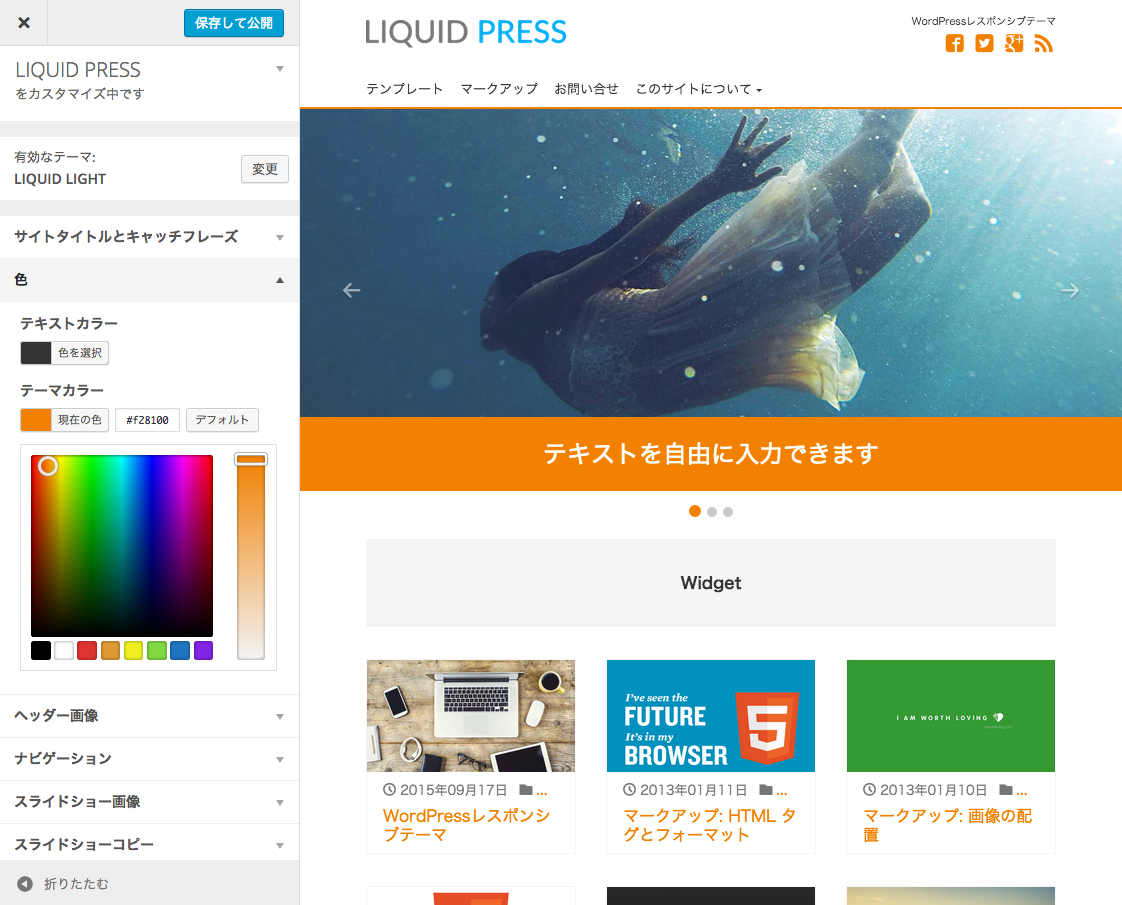 *The available settings vary by theme.
-
Header Image (logo)
Set the logo image displayed in the header.
Click "Add new image" and select an image from the media library.
If no image is set, the site title is displayed as text.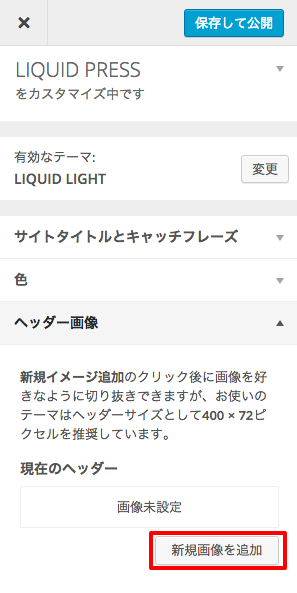 To upload an image, drag and drop it into the media library.
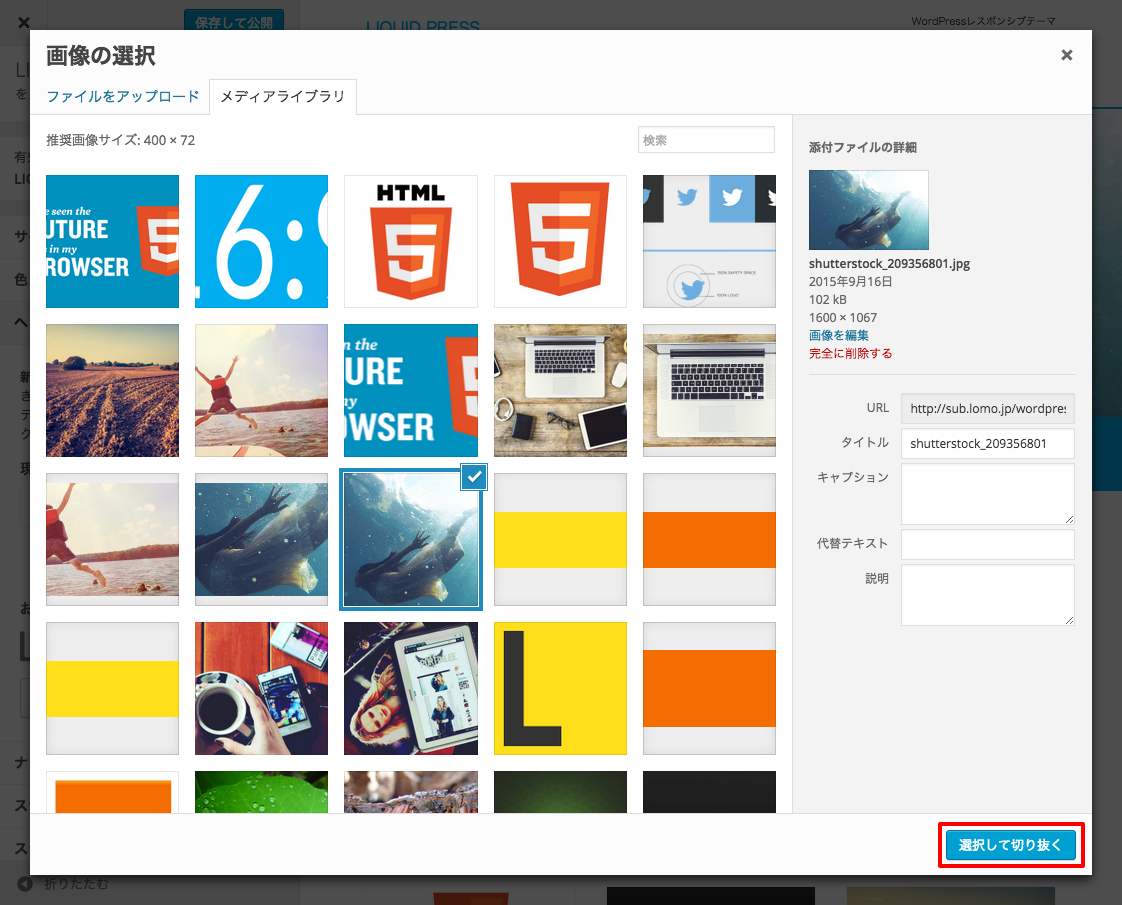 Clicking "Select and Crop" lets you crop the image to any size you like.
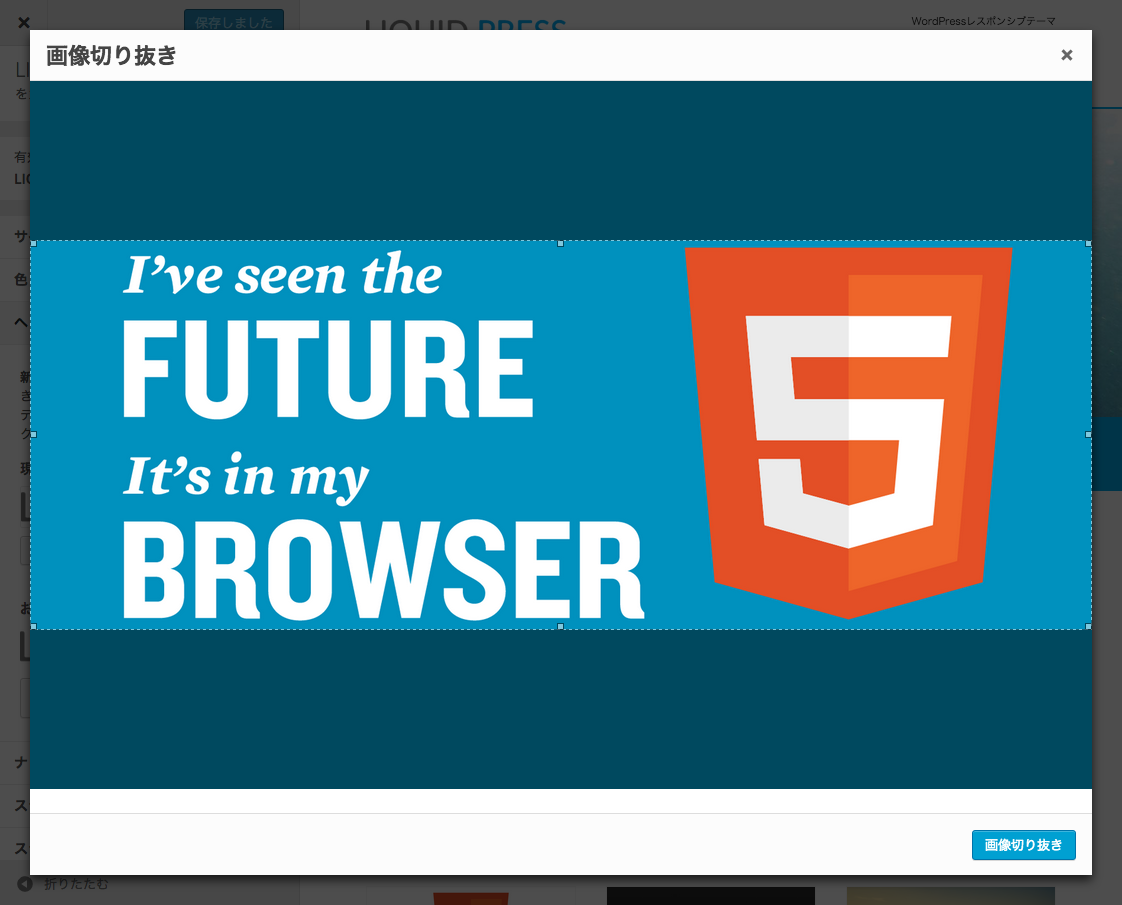
Logo link URL
You can change the destination the logo links to. The default is the site's top page.Logo image height
You can change the size of the logo. -
Background Image
Set the site's background image.
Click "Select image" and choose an image from the media library.
You can configure presets, image position, image size, repeat on/off, and scroll on/off.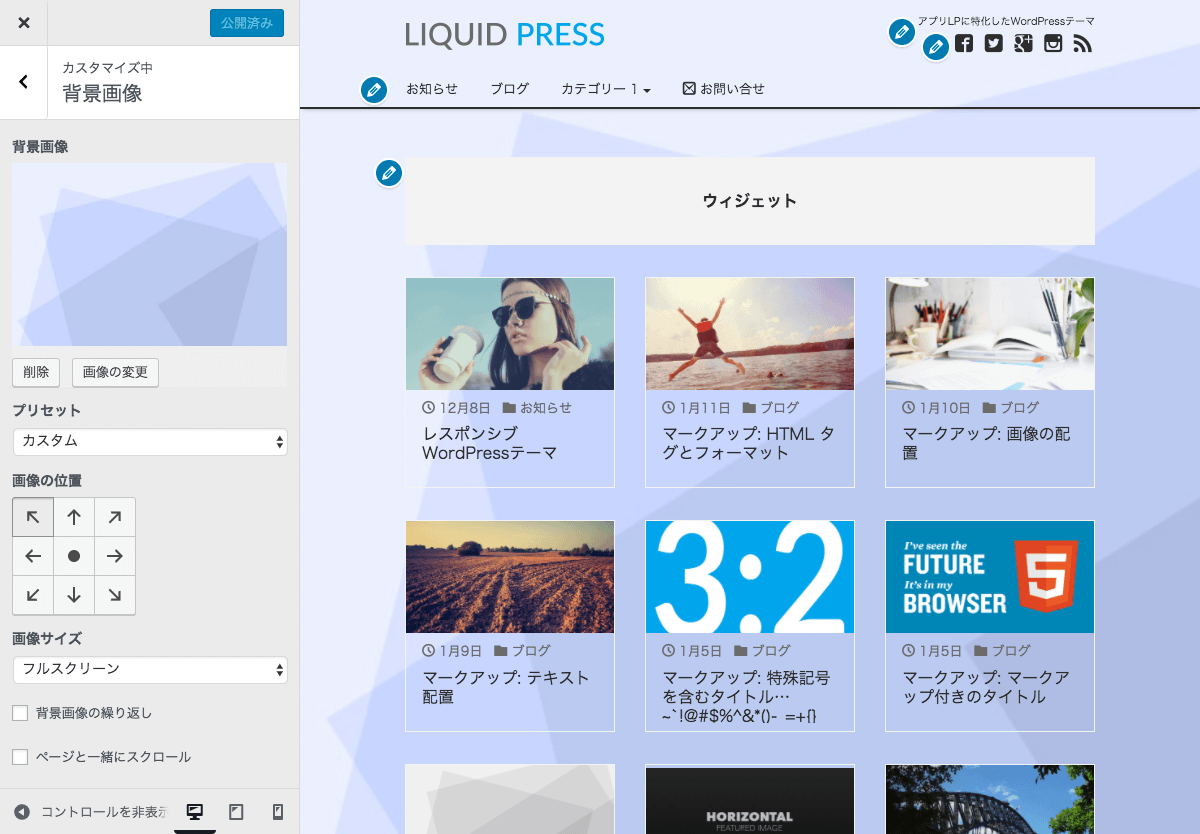
-
Menus
Global menu
Set the global navigation at Customize > Menus (Navigation).
For the menu location, select "Global Menu."
There are also sticky menu and special header features, so please see below for details.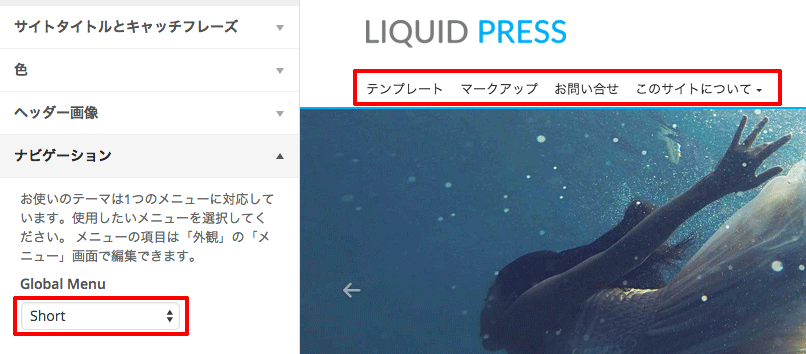
Creating a menu
Menus can also be configured at WordPress admin screen > Appearance > Menus.
Click "Create New Menu," give the menu a name, and save.
It is convenient to create several menus, such as ones for the sidebar and the footer.Editing a menu
For menu item contents, you can select static pages or categories, or add any URL you like as a custom link.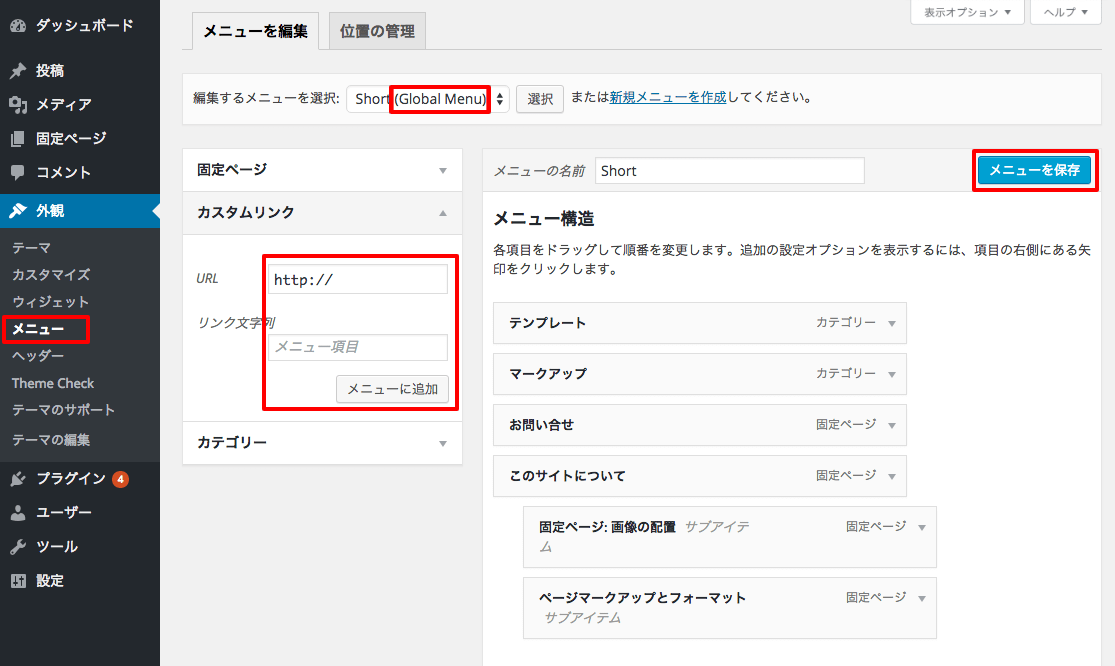
Menu hierarchy
Menus can also be given a hierarchical structure. Dropdown display of sub-items (on desktop and tablet) and third-level items are supported. Dropdown display can be customized under Options.
If you do not want the parent menu item to be a link, add the CSS class option "nav_ttl."
*If the option is not shown on the edit screen, check "CSS Classes" under "Screen Options" at the top.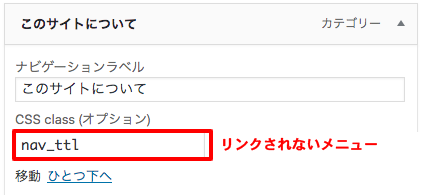
Open in a new window
For each menu item, you can set a checkbox to open it in a new window.
*If the option is not shown on the edit screen, check "Link Target" under "Screen Options" at the top.Icons / size / other
Menu items support icon fonts, display utilities (such as menu items hidden on mobile), and HTML tags.<i class="icon-home"></i> Icon menu<small>Small size</small><big>Large size</big><span class="d-none d-sm-block">Menu item hidden on mobile</span>Navigation menu
A menu can be placed in a widget area as a "Navigation Menu (custom menu)" widget.
It can be placed in the sidebar, the footer, and elsewhere.Sticky menu
Selecting the menu location "Global Menu Fixed" turns it into a sticky header menu. *Supported themes only.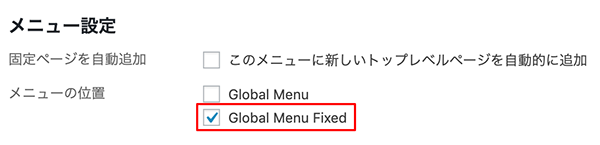
Special header menu
Selecting the menu location "Special Menu" lets you display a second-level menu below the global menu. *Supported themes only.
For details, please see the customization manual.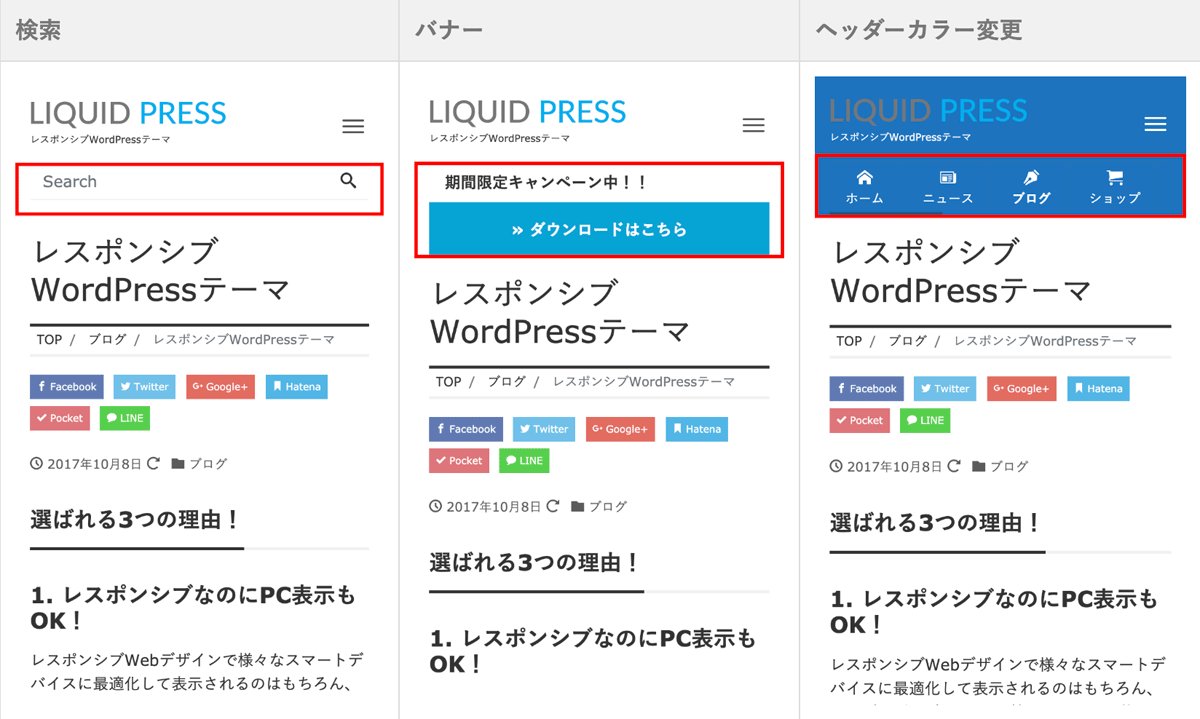
Fixed footer menu
Selecting the menu location "Footer Menu" lets you display a menu that sticks to the footer. *Supported themes only.
For details, please see the customization manual.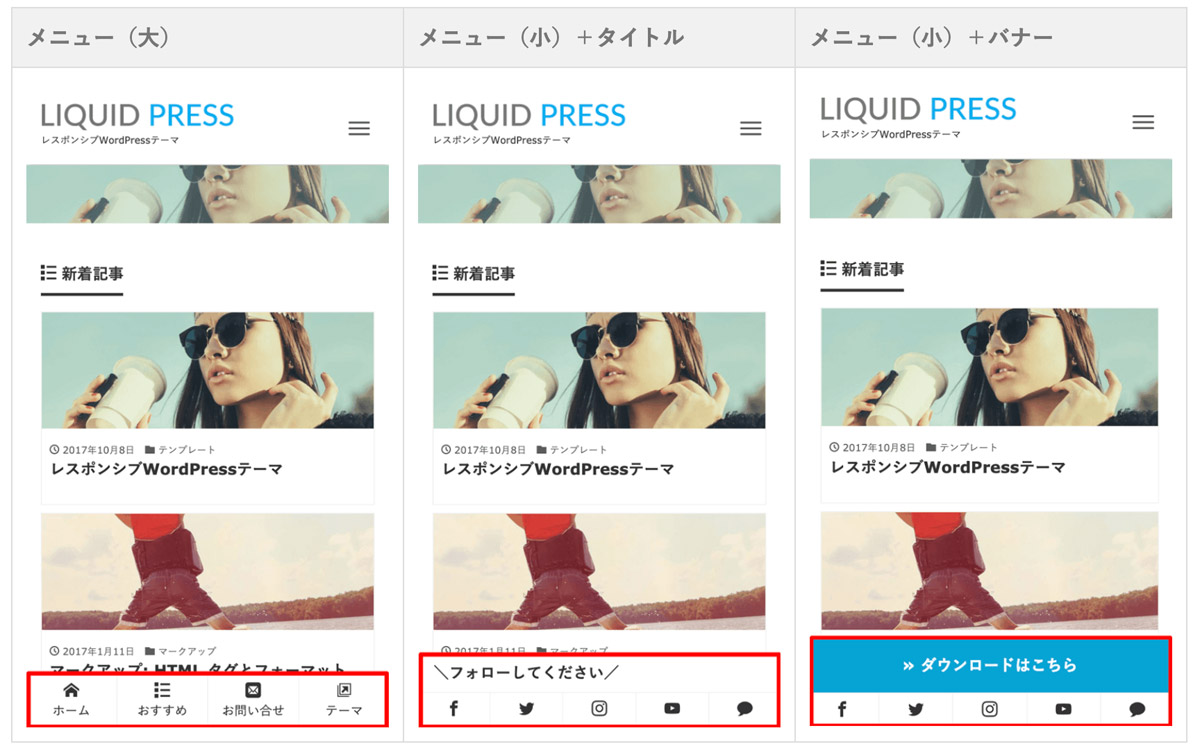
"MENU" label on the smartphone version
You can add a "MENU" label to the menu icon in the smartphone version.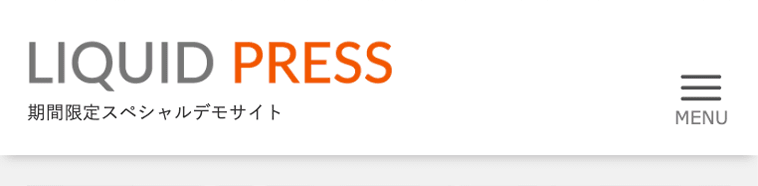 For details, please see design skins and parts.
-
Slideshow Images / Video
If you want to set three or more images, please use the slider block in Widgets > Slideshow area.
Images (slideshow)
Select the image or slideshow displayed in the header. Click "Select image" and set from one to three images.
To upload an image, drag and drop it into the media library.
We recommend an aspect ratio of roughly 2:1 (width to height). The size is adjusted automatically, but we recommend at least 1200px wide.
*The LP theme does not support slideshows because it has an LP template.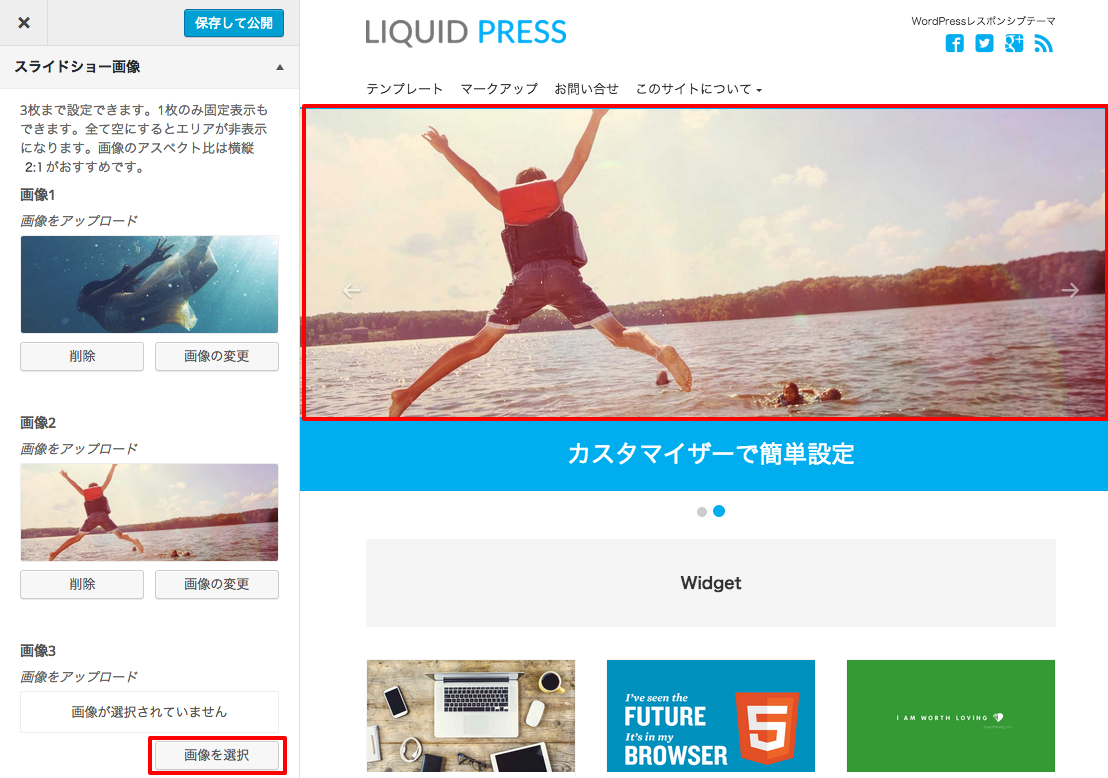
Editing images
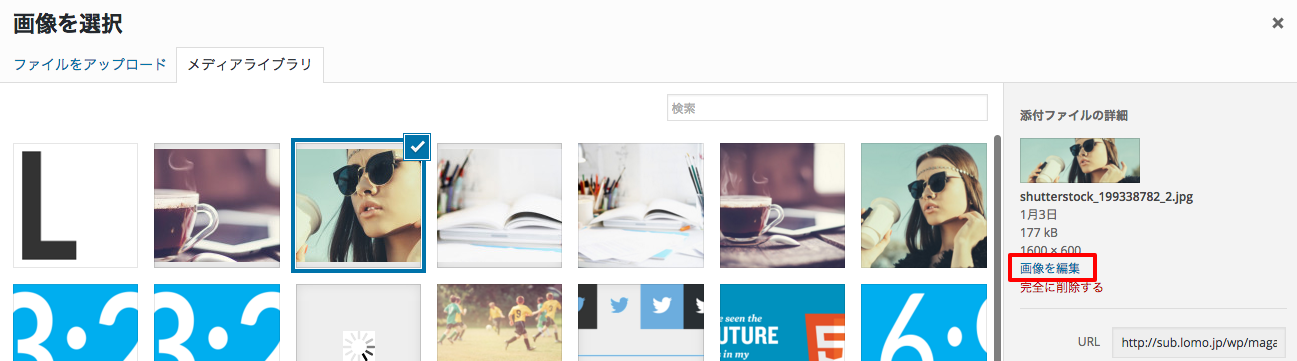
To change the size of an image, click "Edit Image" on the right side of the selection screen.
 1. On the image editing screen, drag over the image or enter values under "Selection" on the right to determine the size.
2. Click the "Crop" button at the top left.
3. Click "Save." 4. Click "Update."
1. On the image editing screen, drag over the image or enter values under "Selection" on the right to determine the size.
2. Click the "Crop" button at the top left.
3. Click "Save." 4. Click "Update."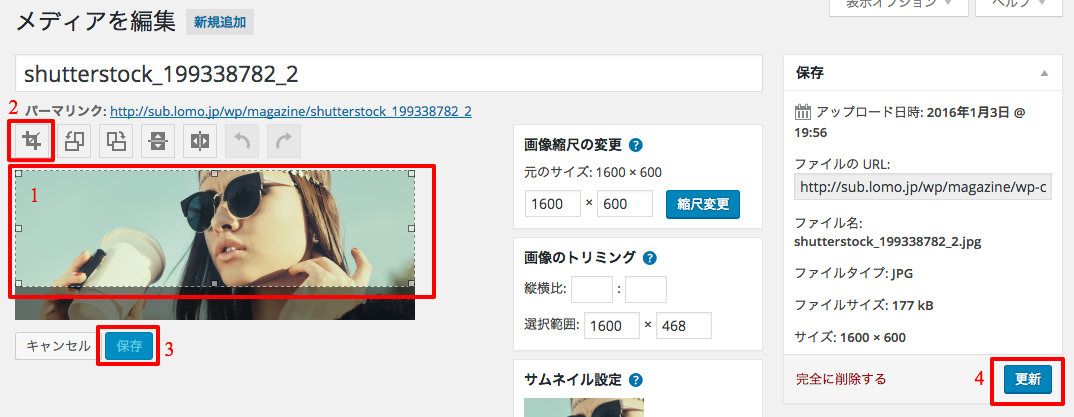
Video (MP4/WebM, YouTube)
Video can also be displayed. The order of priority is MP4/WebM, YouTube, then slideshow images.
*For YouTube, enter the full URL (https://www.youtube.com/watch?v=...), not the short URL (https://youtu.be/...).
*When a video is set, the slideshow does not slide. *On smartphones, slideshow images are shown instead of video to reduce data usage.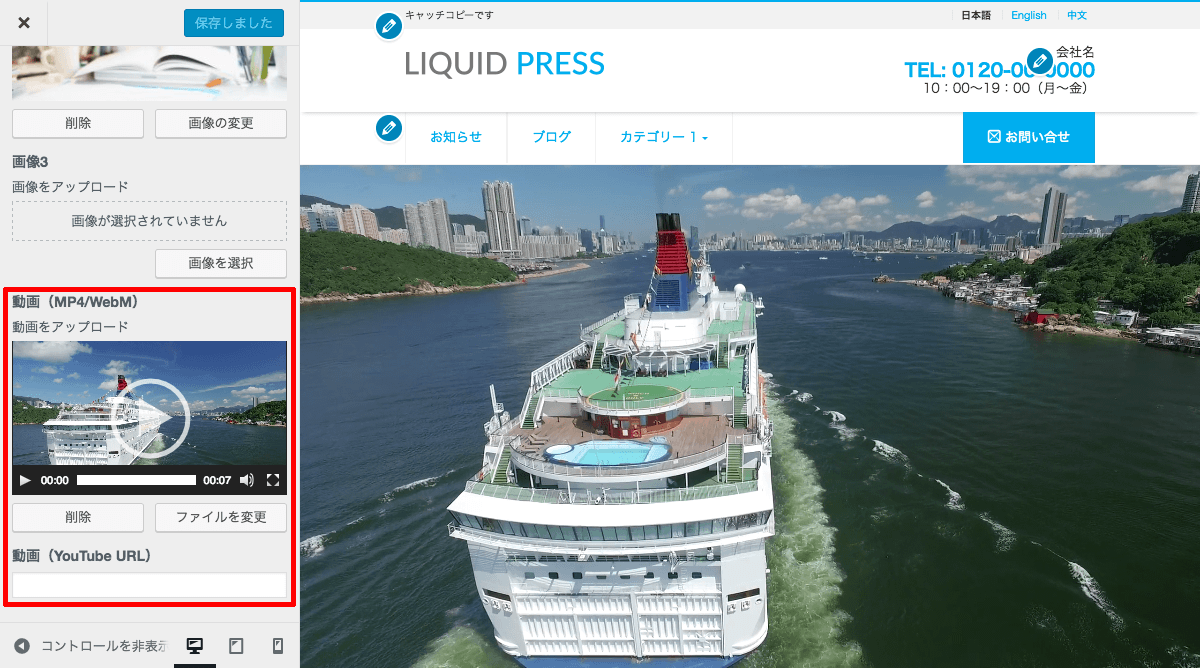
Video (playback options)
You can set playback options for uploaded video. Because the latest browsers do not allow autoplay of video with sound, enter controls to display a play button. For video without sound, entering muted allows autoplay.
*This is due to browser specifications. -
Slideshow Settings
Configure animation and overlays. *The LIGHT theme does not support this.

Animation
You can choose slide or fade.
Overlay heading
Specify the (large) text overlaid on the image.
Overlay message
Specify the (small) text overlaid on the image. Tags may be used.
Overlay button
Specify the label of the button overlaid on the image.
Overlay button link URL
Specify the link URL of the button overlaid on the image.
Using the "Copy" setting below, you can also specify three separate link URLs.Overlay position
Specify left, center, or right alignment for the elements overlaid on the image.
Copy
Set the copy text or link URL displayed below the slideshow image.
If you enter only a URL (starting with http), the image becomes a link. Nothing is displayed below it.https://example.comYou can also insert a link using an a tag. Inserting a link also makes the image clickable.<a href="link URL">Copy text</a>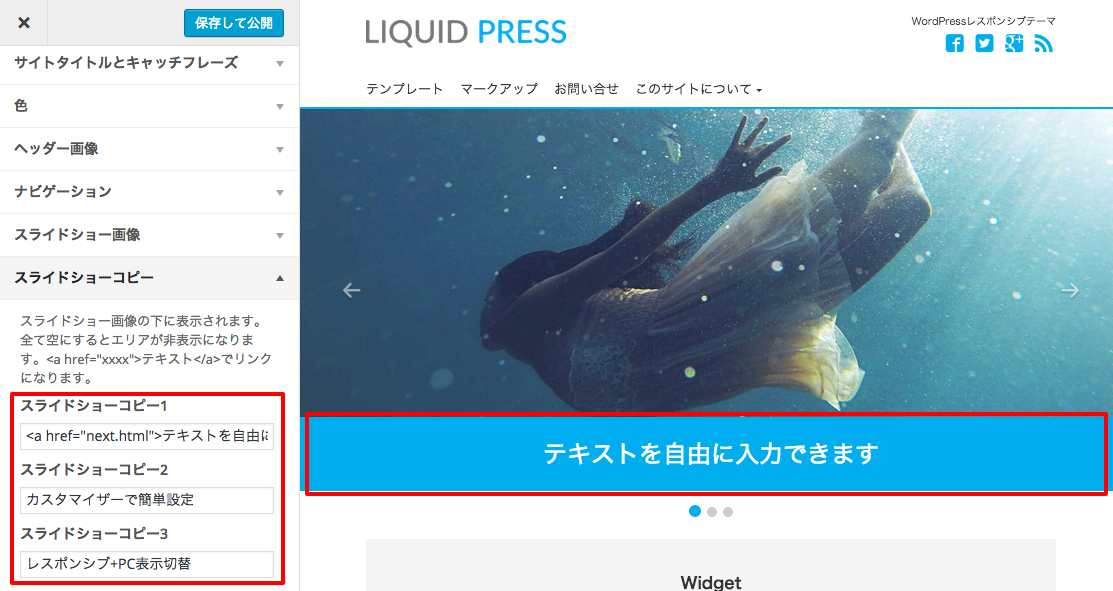
-
Layout
Set the site layout at Appearance > Customize > Layout.
You can also click links inside the preview to preview sub pages. *The available settings vary by theme. Please also see the theme-specific configuration guides.Columns
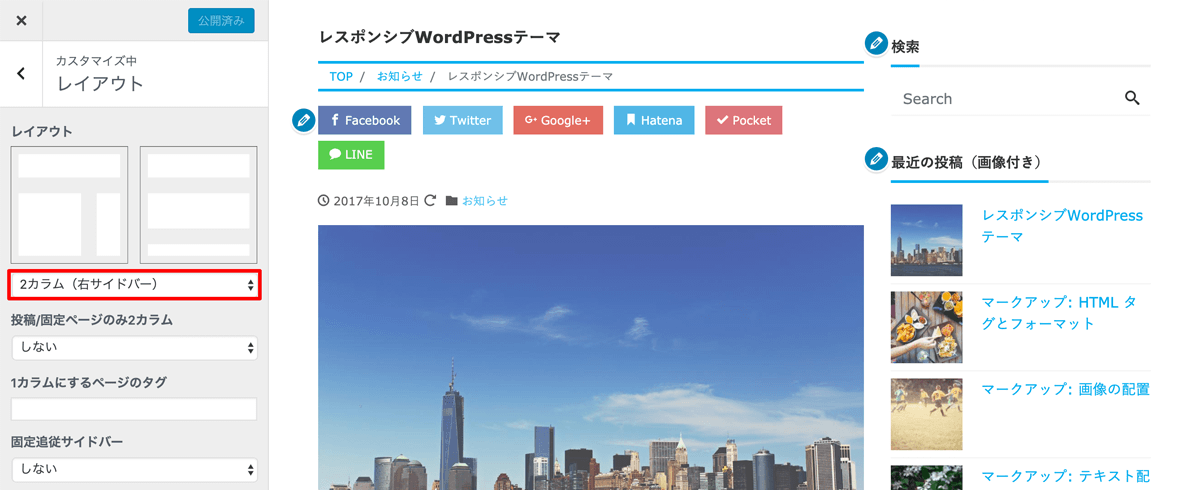 Set the column layout.
You can choose two columns (right sidebar), two columns (left sidebar), or one column.Two columns for posts/static pages only
Set whether to use two columns for posts and static pages only.Tags for pages to display in one column
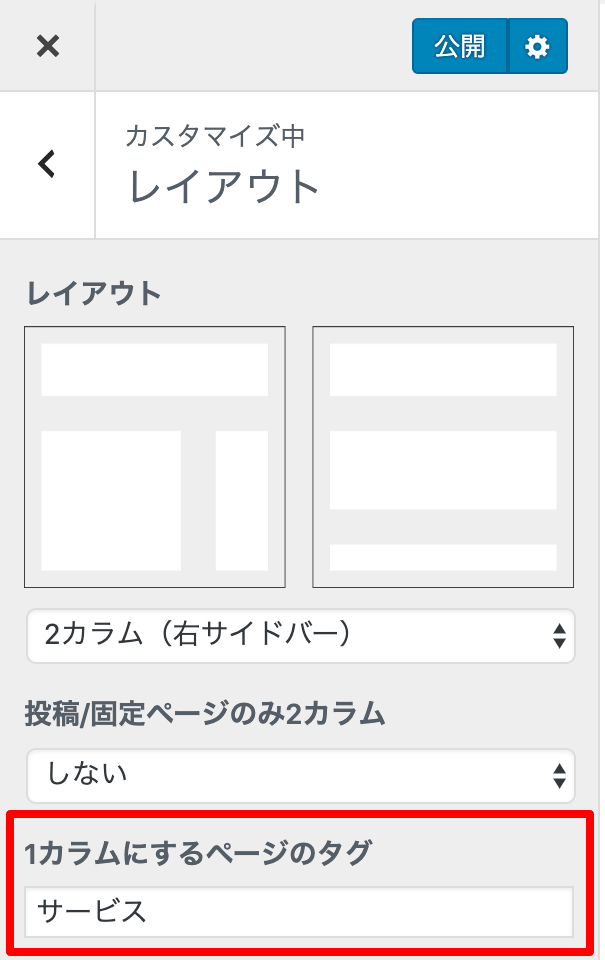 You can also make only certain posts or static pages one column. For example, if you want service pages to be one column, enter "service" here and assign the "service" tag to the relevant pages.
To specify multiple tags, separate them with commas.
Pages also become one column when the "LIQUID" template is selected under static page attributes.Sticky sidebar
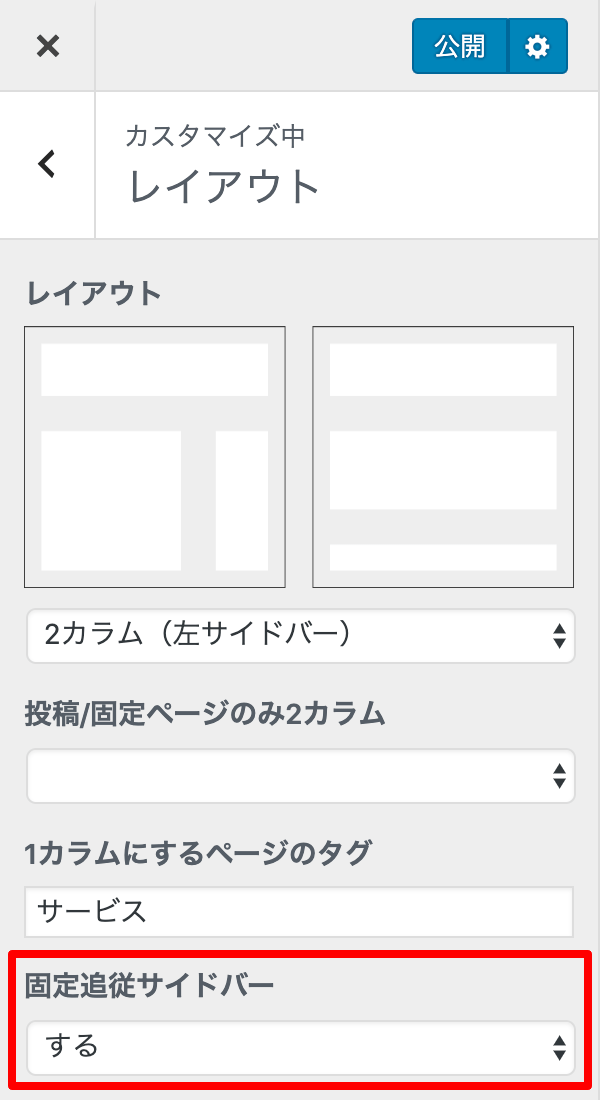 Set whether the sidebar follows the scroll.
If you place ads in the sidebar, please check the guidelines regarding ads that follow the scroll. -
Featured Images
Display the featured image inside posts/static pages
Set whether to show or hide the featured image inside post pages. *The LIGHT theme does not support this.
For how to set a featured image, please see here.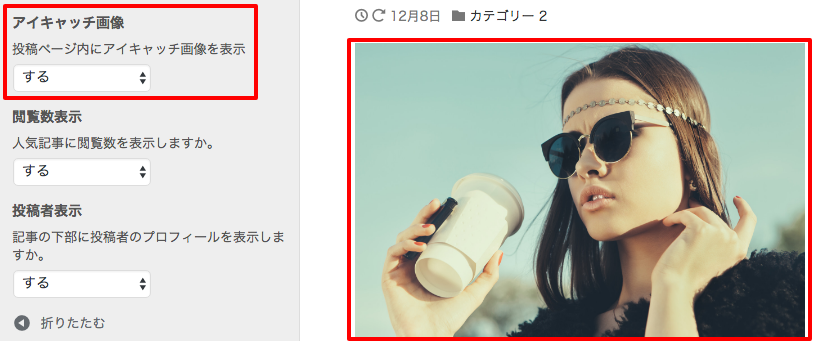
On supported themes, you can also choose to display it above the article title.
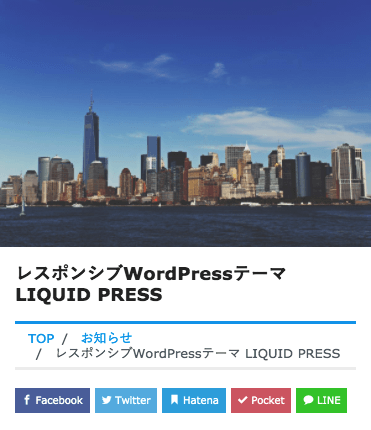
Display featured images on listing pages
Set whether to show or hide featured images on listing pages.
*The available settings vary by theme. -
Displaying Related Posts
Set whether to display the related posts that appear automatically at the bottom of post pages.
*The LIGHT theme does not support this. -
Infinite Scroll
Set whether to use infinite scroll.
*Themes without this setting can use the "YITH Infinite Scrolling" plugin instead. -
Social Media Accounts
Set your social media accounts. Enter the account URLs for Facebook, X (Twitter), and so on.
These are reflected in the social icons and their link destinations in the header and footer.
You can also set whether to show or hide the Feed (RSS) icon here.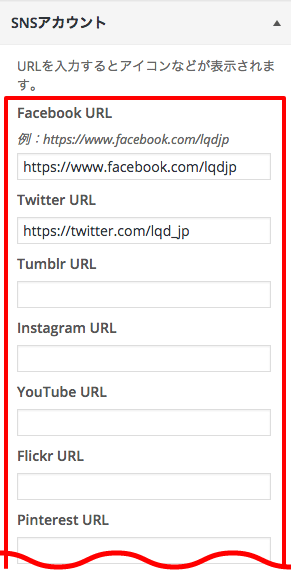
Custom social media (free entry)
With custom social media, you can enter HTML tags freely. *The LIGHT theme does not support this.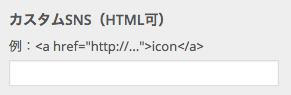
-
Social Share Buttons
Configure the social share buttons.
You can set options such as "Do not display on static pages" and show/hide for each individual button.
Sharing (a browser feature) supports copying the URL, sharing by email, AirDrop, and more.
These settings can also be placed anywhere you like as the "Share Buttons" widget.
Another approach is to set it to "Do not display" and instead place official share buttons or a plugin widget at the "top/bottom of post pages" or the "top/bottom of static pages."
*The LIGHT theme does not support this.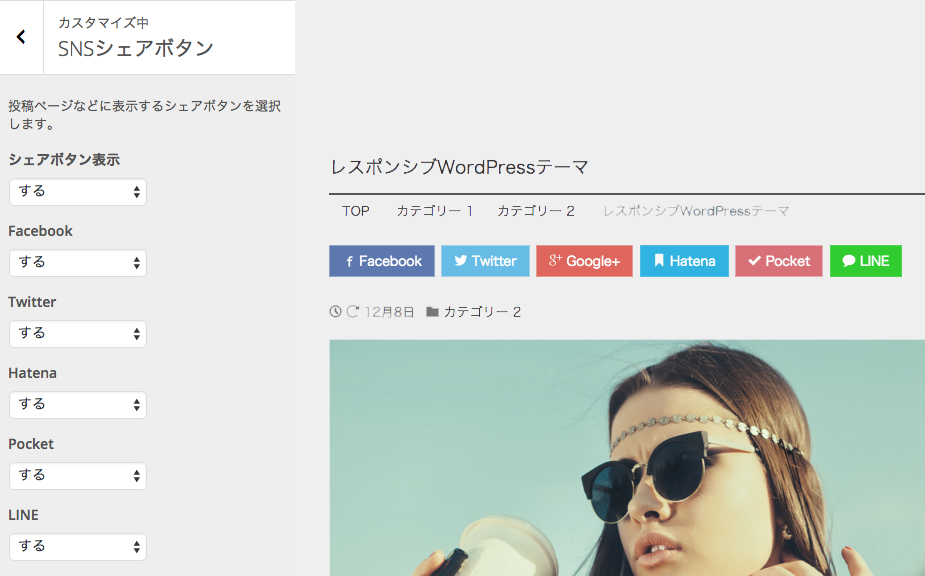
-
Google Analytics
Set your Google Analytics ID (either one). The latest GA4 is supported.
Check your ID at Google Analytics > Analytics settings > Property settings.For a measurement ID (GA4)
Example: G-XXXXXXXXXXFor a tracking ID
Example: UA-XXXXXXX-XX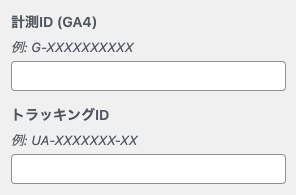 Once you enter the ID, the analytics tag is inserted automatically. Because it is applied in the internal code, it cannot be checked in the preview.
Please confirm in your Google Analytics reports that data is being collected correctly.
*Please set only one of the two. Also, please configure it in either the theme or a plugin, not both.
*The standard tracking code is inserted. If you want to customize the code, or if you use Google Tag Manager, please use the custom HEAD, the Site Kit by Google plugin, the wp_body_open() hook, or similar. -
Widgets
WordPress 5.8 and later supports widget blocks.
Configuring Widgets
Configure widgets at WordPress admin screen > Appearance > Customize, or at WordPress admin screen > Appearance > Widgets.
Click "Add a Widget" to add and configure widgets such as "Recent Posts," "Custom Menu," "Categories," "Tag Cloud," and "Custom HTML."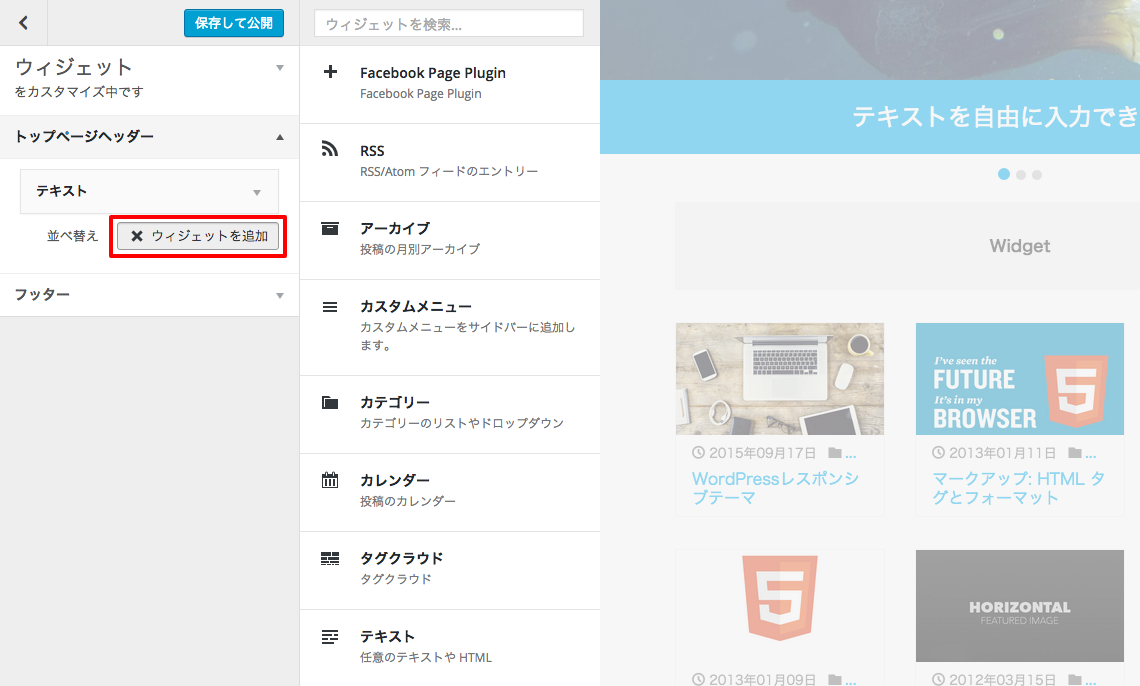 Select a widget area to configure the contents of each widget.
In the preview, you can also Shift+click a widget to edit its contents on the spot. Clicking "Delete" removes the widget from that area.
Clicking the "<" at the top left returns you to the settings other than widgets.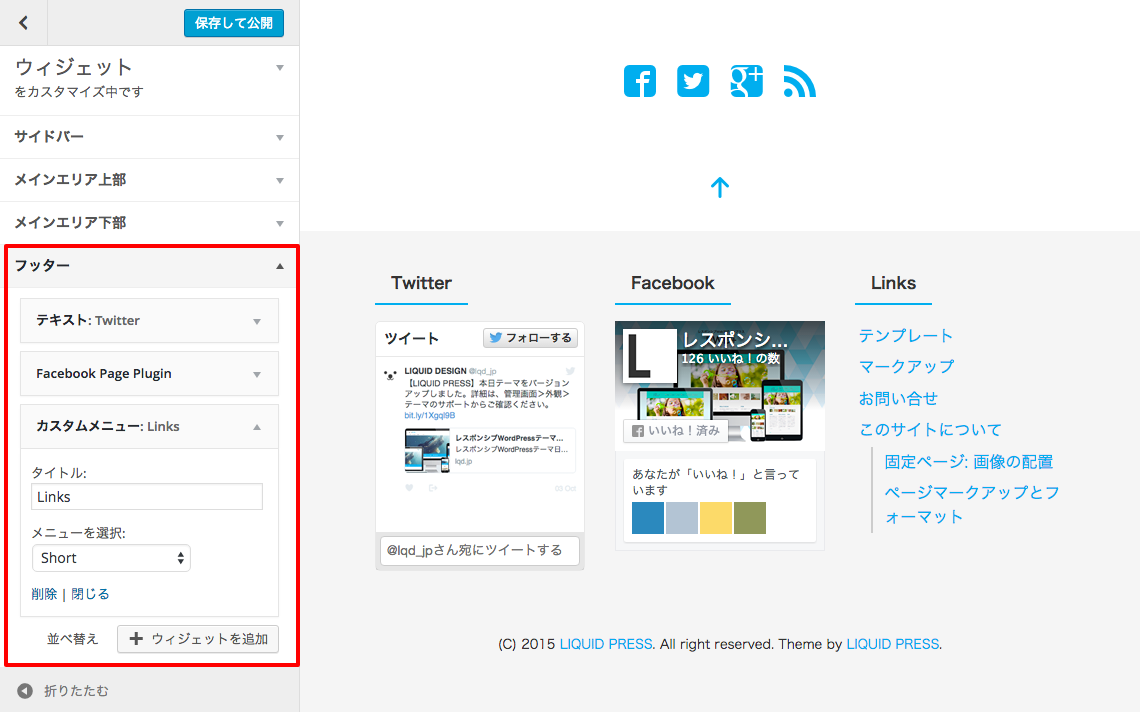 For details, please see here.
-
Mobile Switching / Column Count Settings
For each widget, you can configure desktop/mobile switching and the number of columns.
For details, please see here.
*For widget blocks, please see switching by screen size in the block editor.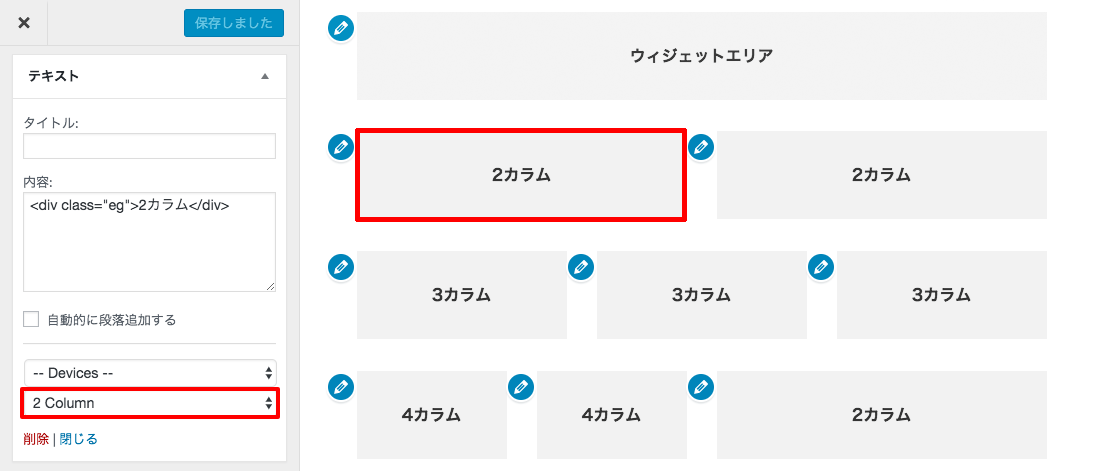
-
Homepage Settings (static front page)
Configure this at WordPress admin screen > Appearance > Customize, or at WordPress admin screen > Settings > Reading.
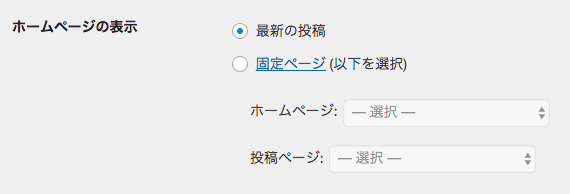 Your latest posts: this is the default setting.
A static page: you can display any static page as the top page.
*Because the top page becomes the selected static page, content such as Layout > Slideshow will no longer be displayed there. It is displayed on the posts page selected below instead.Homepage: select the static page to use as the top page.
Posts page: select the static page on which to display the post listing. -
Custom Header
For details, please also see How to customize WordPress theme CSS.
-
Custom HEAD
At Customize > Custom Header, set the HTML tags to insert inside the HEAD.
You can add META tags, CSS, JavaScript, and more without being affected by updates.
*The LIGHT theme does not support this. Also, customization is outside the scope of setup support.Example of adding a Google Search Console HTML tag
<meta name="google-site-verification" content="..." /> -
Custom CSS
At Customize > Custom Header, set the CSS to insert inside the head.
You can add CSS styles without being affected by updates.
*The LIGHT theme does not support this. Also, customization is outside the scope of setup support.Example of changing the sidebar design
.sidebar { border: 1px solid #ccc; }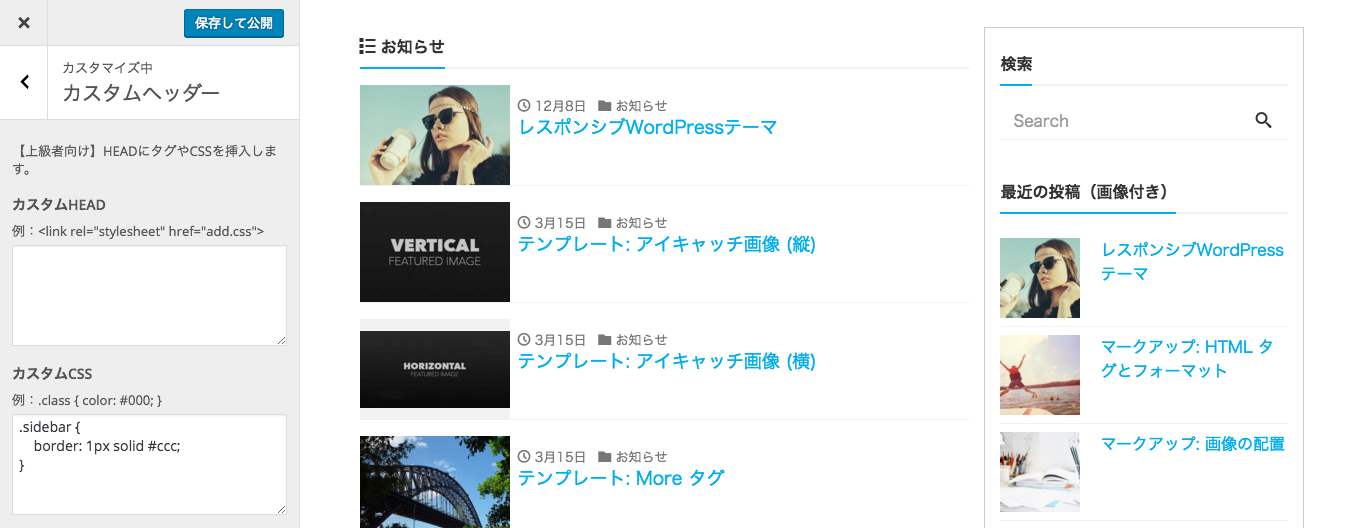
-
Custom BODY
At Customize > Custom Header, set the HTML tags to insert immediately after the body tag.
You can add Google Tag Manager tags and the like.
*The LIGHT theme does not support this. Also, customization is outside the scope of setup support. -
SEO/AIO
At Customize > SEO, you can configure META tags, OGP and Twitter Cards, and AI crawlers (GPTBot, etc.).
You can set automatic display and whether to allow them.
*If you use an SEO-related plugin, set display to "off" to prevent duplicate tags.
*When Yoast SEO or All in One SEO Pack is active, these settings are automatically disabled.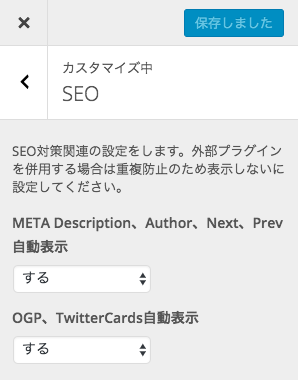
-
Options
At Customize > Options, you can configure theme-related options.
[For advanced users] The option features are outside the scope of setup support. *The available settings vary by theme. -
Viewport Customization
You can customize the viewport.
-
Dropdown Menus
You can customize the header menu.
On: dropdown display on all devices (the demo site setting)
Off: dropdown display on desktop and tablet (default) -
Widget Device Detection / Column Settings
Adds the device detection and column settings features. The default is "on."
*The LIGHT theme does not support column settings. -
Widget Device Detection (UA)
Adds UA-based detection to device detection. The default is "off."
-
Automatic Tag Insertion
Converts line breaks in the articles you write into p tags and inserts them automatically. The WordPress default is "on."
-
License ID (copyright notice)
Email address
Please enter the email address you used at the time of purchase.Removing the copyright notice
You can choose whether to remove the copyright notice. *Premium themes only.Credit text
You can change the credit text in the site footer. By default, the site title is displayed.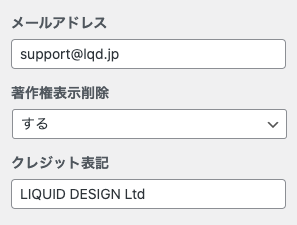 Once you set the license ID (email address), you can view the manuals and more on the Appearance > Theme Support screen.
-
General Settings (WordPress settings)
General settings are a feature of WordPress core, so please see the official WordPress manual for details.
Configure the basic settings for your site at WordPress admin screen > General Settings.
Administration Screens / General Settings - WordPress Codex Japanese edition -
Number of Posts Displayed Per Page
This is done at WordPress admin screen > Settings > Reading > Blog pages show at most.
Around 10 items is optimal. For a three-column layout, a multiple of three such as 9 is recommended. -
Date Format
Configure this at WordPress admin screen > Settings > General > Date Format.
For detailed customization, please see Formatting Date and Time. -
Homepage Settings
Configure this at admin screen > Settings > Reading.
Set the "Your latest posts" option. For details, see here.
-
Comments
Configure this at admin screen > Settings > Discussion.
Set the "Allow people to submit comments on new posts" checkbox.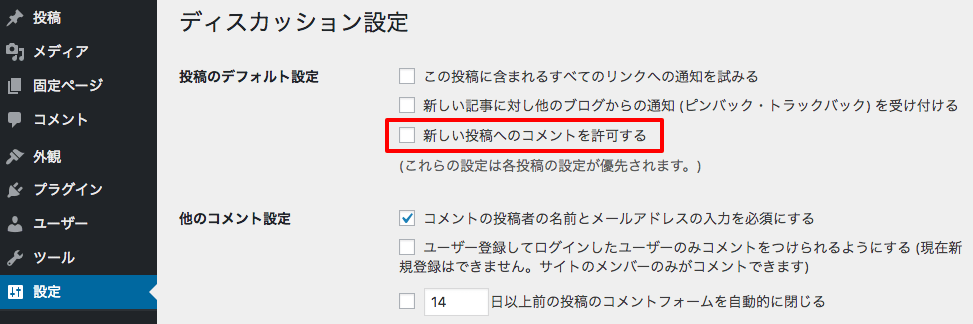 For existing posts, set the "Allow comments" checkbox under Discussion on the Posts > Edit screen.
*If the discussion settings are not shown on the edit screen, set the checkbox under "Screen Options" at the top.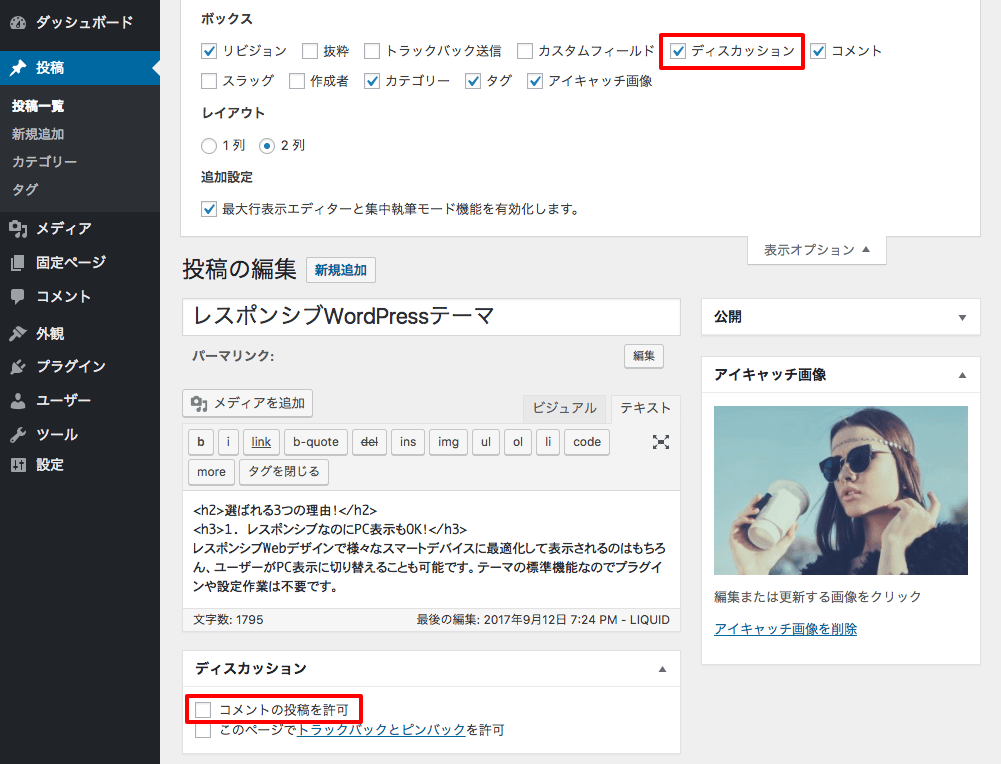
-
Permalink Settings
Configure this at admin screen > Settings > Permalinks. This sets the URL structure within your site.
URL structure is one of the important points for SEO as well. The setting we generally recommend is "Custom Structure."To use the post ID (auto-numbered)
Example URL: https://example.com/category/0001/%category%/%post_id%To set a page name for each post
Example URL: https://example.com/category/postname/%category%/%postname%